Le April 25, 2025, par Joris Vinière.
Creation of a PHP / Symfony bundle
Introduction
Symfony is a PHP language based framework, if you use this framework, you may have glimpsed the notion of bundles, which is the basis of how Symfony works. A bundle is the equivalent of a plugin and could be seen as a toolbox that meets a defined functional scope.
In this post, we will detail the steps so that you can create a bundle and install it via composer. To illustrate our explanations, we have created a bundle "Hello world" available on our Github.
Structure
Here is the list of folders that can make up a Symfony bundle :
assets/ : Contains JavaScript, TypeScript, CSS source files and also images or other files that are not linked to the public folder.
config/ : Contains the bundle configuration (routing, service definition, etc.).
public/ : Contains the compiled files (CSS, JavaScript) and images copied into this folder.
src/ : Contains classes useful for bundle logic.
templates/ : Contains the templates.
tests/ : Contains the tests (unitaires, fonctionnels).
translations/ : Contains the translation files.
Not all of these folders are essential, in our case we will only use the src/ folder, this is what our bundle will look like:
IDCI/
├─ HelloWorldBundle/
│ ├─ src/
│ │ ├─ HelloWorldBundle.php
│ ├─ composer.json
Basic files
composer.json
The first file to add to your bundle folder is composer.json. Make sure to add, remove or replace the information specific to your needs.
{
	"name": "idci/hello-world-bundle",
	"description": "Your bundle's description",
	"type": "symfony-bundle",
	"license": "CECILL-C",
	"keywords": ["tutorial", "Symfony", "Bundle", "composer", "packagist"],
	"authors": [
		{
			"name": "Joris VINIERE",
			"email": "joris.viniere@idci-consulting.fr"
		}
	],
	"require": {
			"php": "^7.1 || ^8.0",
			"symfony/framework-bundle": "^6.1"
	},
	"autoload": {
		"psr-4": {
			"IDCI\\Bundle\\HelloWorldBundle\\": "src/"
		},
		"exclude-from-classmap": [
			"/Tests/"
		]
	}
}
Some information about the keys in the composer.json file:
name : The bundle's name.
description : The bundle's description.
type : Bundle type which may differ depending on the desired installation logic.
authors : List of bundle authors.
require : List of bundle dependencies. Here you can associate a package name with a version to mention the dependency.
autoload : Mapping of automatic class loading. Here we use 2 keys:
psr-4 : PSR-4 is an autoload standard that allows you to specify the file structure and how to write namespaces. In our example, the src/ folder will be associated with the IDCI\Bundle\HelloWorldBundle\ namespace.
exclude-from-classmap : Allows you to exclude files or folders from autoloading. In our case, all files contained in the Tests/ folder will be excluded from autoloading.
HelloWorldBundle.php
The next step is to create your bundle class, it is important to note that your class name must end with "Bundle" as seen in our example:
// src/HelloWorldBundle.php
<?php

namespace IDCI\Bundle\HelloWorldBundle;

use Symfony\Component\HttpKernel\Bundle\AbstractBundle;

class HelloWorldBundle extends AbstractBundle
{
}
Our class inherits from the abstract class AbstractBundle. As a reminder, the primary characteristic of an abstract class is that it cannot be instantiated. Inheriting from the AbstractBundle class allows you to benefit from the basic functionality provided by this class.
There you have it! With this, you have the functional basis of a Symfony bundle.
Installing the bundle
Now that we've finished creating the basic bundle files, we can install it into our applications. There are two ways to include a Symfony bundle.
Private bundle
If the bundle is not available on Packagist, you must specify the repository source by adding an entry in the repositories key from your application's composer.json file. Here, the type key must mention VCS (Version Control System) and the url key must contain the address of your repository.
{
	"type": "project",
	"license": "proprietary",
	"minimum-stability": "dev",
	"prefer-stable": true,
	"require": {
		"php": ">=8.1",
		"symfony/framework-bundle": "6.4.*",
	},
	"repositories": [
		{
			"type": "vcs",
			"url": "https://github.com/IDCI-Consulting/HelloWorldBundle"
		}
	],
	"autoload": {
		"psr-4": {
			"App\\": "src/"
		}
	}
}
Then you also need to add an entry in the require key.
{
	"type": "project",
	"license": "proprietary",
	"minimum-stability": "dev",
	"prefer-stable": true,
	"require": {
		"php": ">=8.1",
		"symfony/framework-bundle": "6.4.*",
		"idci/hello-world-bundle": "*"
	},
	"repositories": [
		{
			"type": "vcs",
			"url": "https://github.com/IDCI-Consulting/HelloWorldBundle"
		}
	],
	"autoload": {
		"psr-4": {
			"App\\": "src/"
		}
	}
}
Finally, run the composer install command to download and install the dependencies with the version specified in the composer.json file.
It is also possible to replace the entry in require with the following command:
composer require idci/hello-world-bundle
If you want to make sure that the bundle has been installed, you can check its presence in the vendor/ folder of your application.
Public bundle
Register a bundle on Packagist
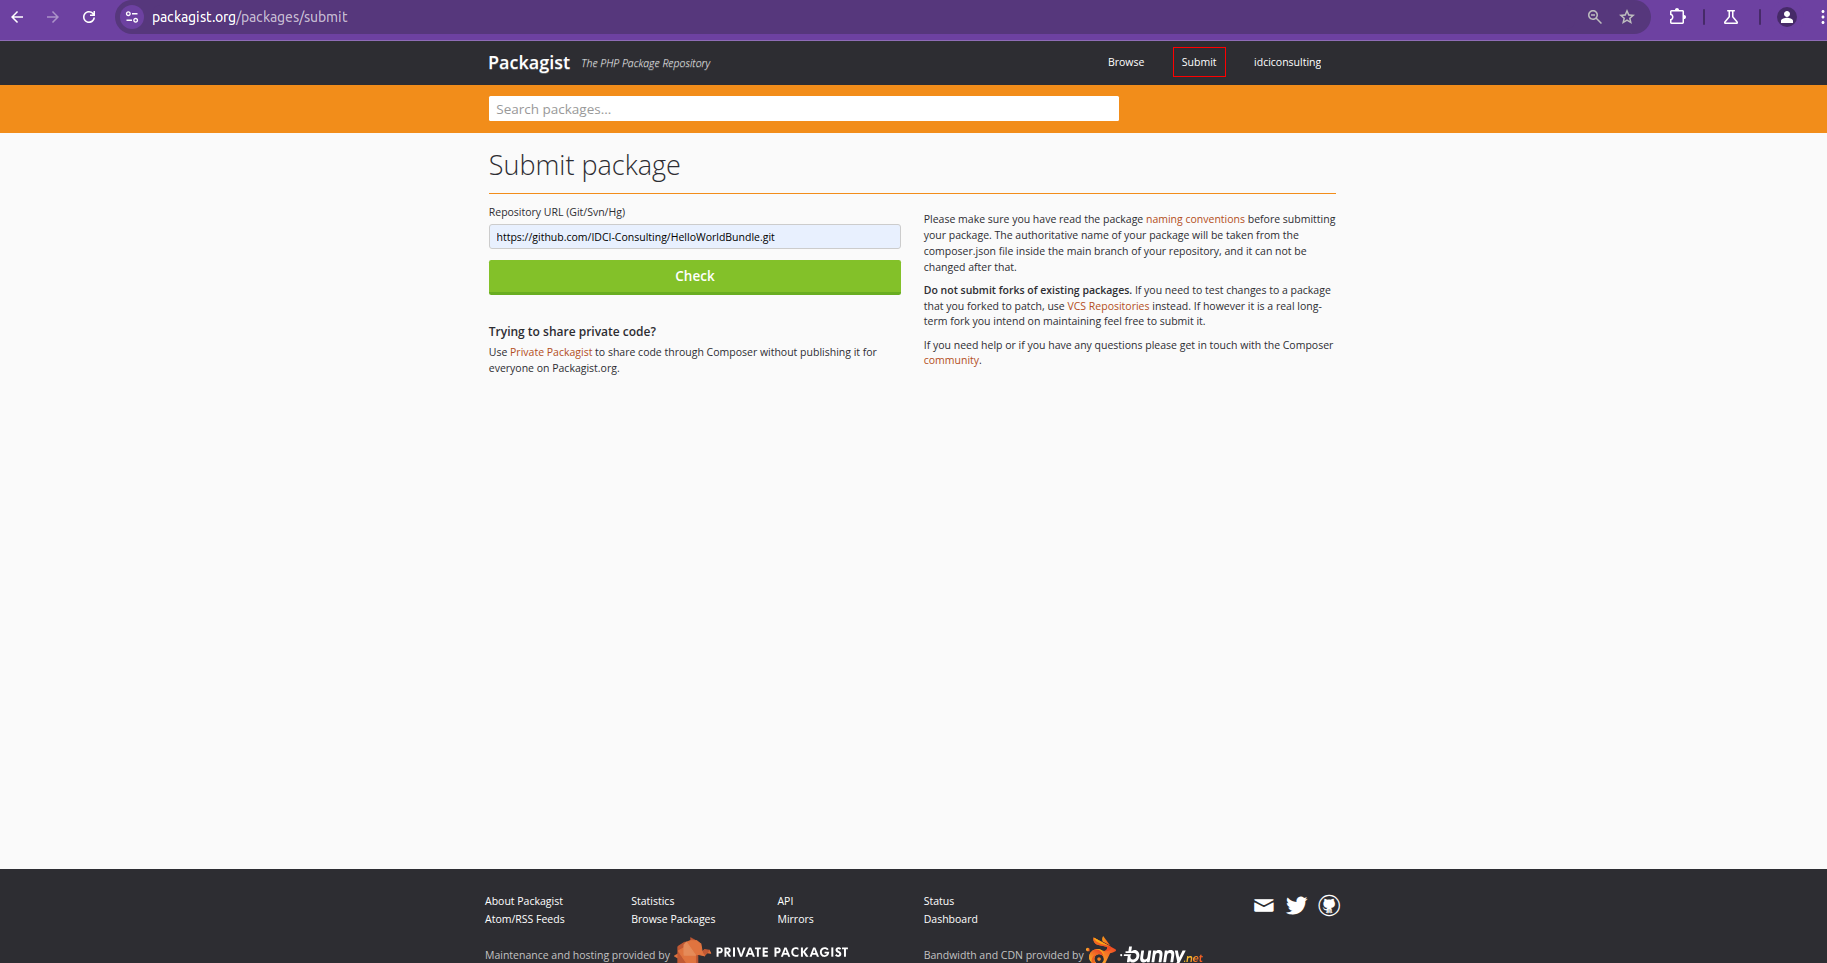
To publicly declare a bundle, you must have an account on the Packagist platform (PHP package repository). Once logged in, go to the "Submit" tab and enter the link to your repository.

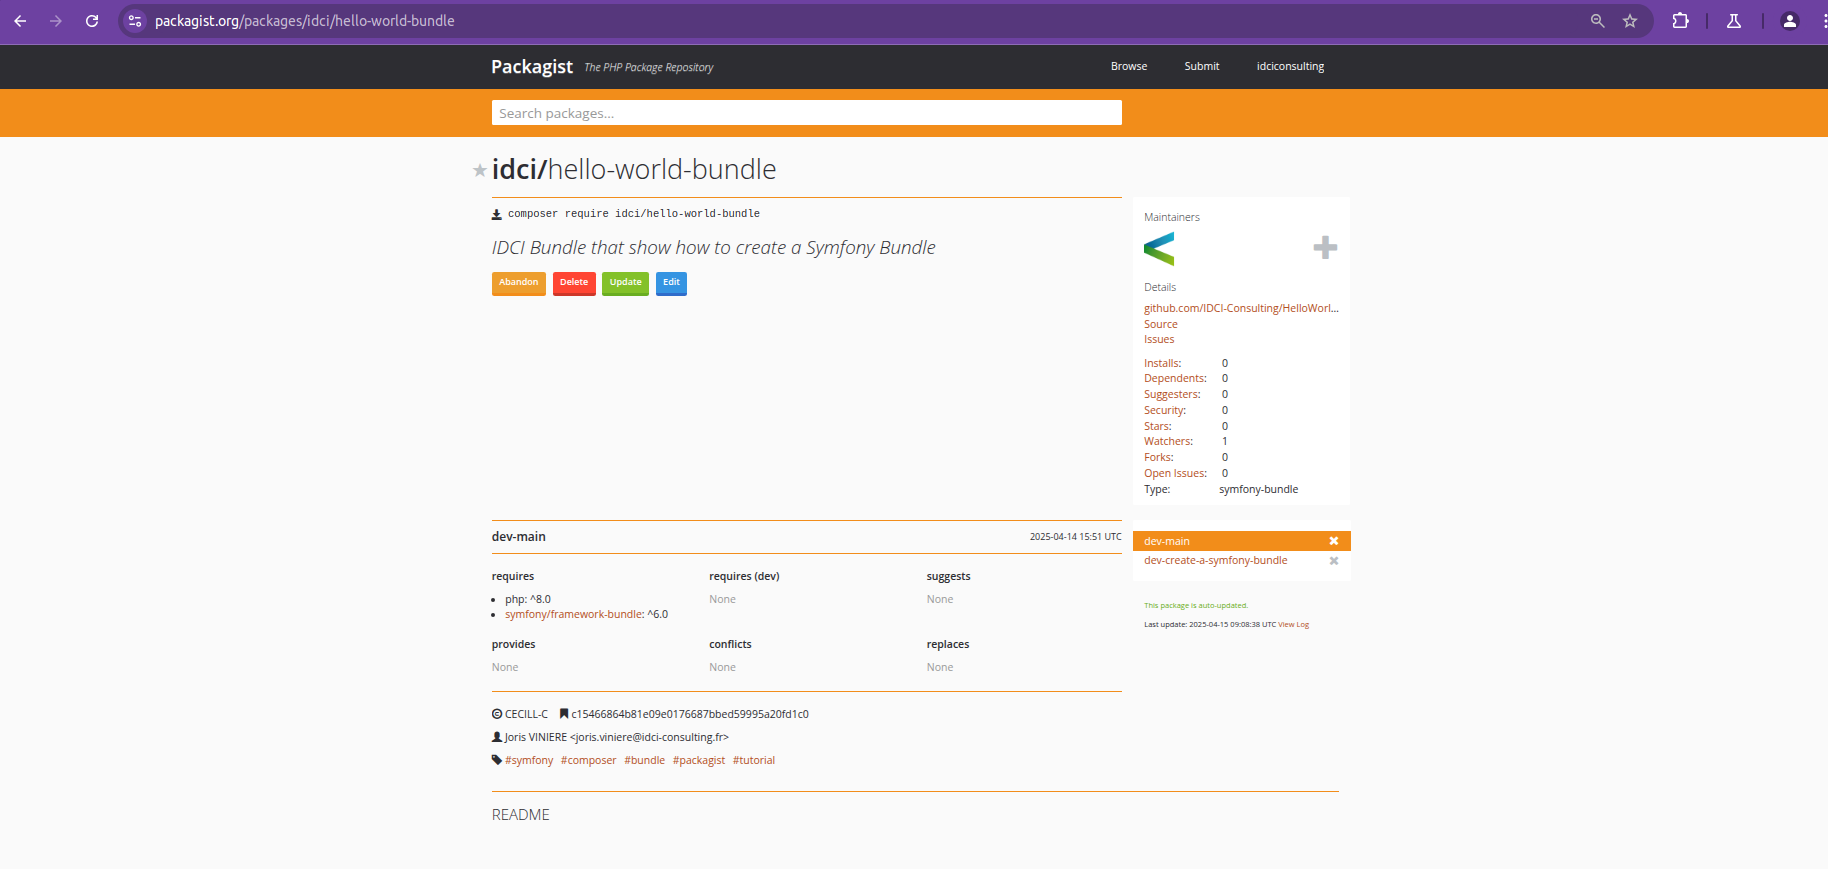
Once your bundle is submitted and validated by Packagist, a dedicated page will be available.

Install a bundle via Packagist
Now that the bundle is referenced on Packagist, you can install it using the composer require command as below:
composer require idci/hello-world-bundle
Done! In this post, we've covered the different steps involved in creating and installing a Symfony Bundle using Composer and, optionally, Packagist.


 Check the example